Finding Remote Work with Python and AI
In this post I present a working Python application that can recommend job offers from a popular remote job board RemoteOK based on our preferences using a supervised machine learning model.

Contents:
Examples for this article can be found in the stribny/python-jobsearch repo. I didn't include full code listings in the article so check it out if you wish to see the whole source code.
Setting up the project
Dependencies
Because the project is a command-line application I picked Typer to define CLI commands and Rich for colorized and table output. I have written about them before in Building command line interfaces in Python. I used a modern HTTP library HTTPX to call the web API, SQLAlchemy ORM to access a local SQLite database and finally scikit-learn to train the machine learning model. scikit-learn is a good choice because it features several classifiers and preprocessing tools in one package.
All of the dependencies are already defined in the repository with Poetry. We can install the project and access its virtual environment with:
poetry install
poetry shell
And test that the application works:
python main.py --help
Project structure
 └──   instance/
 │  ├────   jobposts.db
 │  └────   model.joblib
 └──   jobsearch/
 │  ├────   __init__.py
 │  ├────   dataaccess.py
 │  ├────   jobs.py
 │  └────   remoteok.py
 ├──   main.py
 ├──   poetry.lock
 ├──   pyproject.toml
 └──   README.md
main.py is the entry point of the application. Specialized modules for interacting with the local SQLite database and web APIs are placed in jobsearch package. The instance folder stores the data: jobposts.db is the job database while model.joblib is our trained machine learning model. If you check out the project, the data files won't be there from the start. The database will be created automatically upon running the app and the model will be saved here after training it from labeled data.
Fetching offers
For this project I used a remote job board RemoteOK. It features a simple endpoint with ~250 latest job offers. The API isn't perfect, but the main information about the jobs such as the position, company name, location, some tags and the description are present, although the description is shortened. The code for interacting with RemoteOK is in jobsearch/remoteok.py module. It has one function to download the list of offers in JSON from https://remoteok.io/api:
REMOTEOK_API_URL = "https://remoteok.io/api"

def fetch_jobs() -> list[RemoteOkJobPost]:
    job_list = httpx.get(REMOTEOK_API_URL).json()[1:]
    return [RemoteOkJobPost.from_json(job_post) for job_post in job_list]
The first item in the list has to be skipped since it doesn't contain a job offer, but information on API usage. At this point we have a choice to filter the returned list by passing tags parameter to the RemoteOK's API URL if we want to, e.g. https://remoteok.io/api?tags=python,database.
Storing offers
class JobPost(Base):
    __tablename__ = "job_posts"

    id = Column(Integer, primary_key=True, index=True)
    url = Column(String, nullable=False)
    company = Column(String, nullable=False)
    position = Column(String, nullable=False)
    description = Column(String, nullable=False)
    location = Column(String, nullable=False)
    tags = Column(String, nullable=False)
    label = Column(Integer)

    @property
    def text(self):
        return "\n".join([
            self.company,
            self.position,
            self.description,
            self.tags,
            self.location
        ])


class JobPostLabel:
    NOT_INTERESTED = 0
    INTERESTED = 1
The SQLAlchemy model JobPost is defined in jobsearch/dataaccess.py alongside the necessary infrastructure code for connecting to a local SQLite database. It is used for storing all downloaded job offers. The text property concatenates all information about the job post into one string that will be used by the classifier. I didn't make any attempts to weight the different types of information like position, company or tags, so this is a possible room for improvement. The attribute label determines if we have marked the job post as interesting or not.
The module jobsearch/jobs.py will let us interact with the stored job posts:
def save(session: Session, posts: list[JobPost]) -> None:
    session.bulk_save_objects(posts)
    session.commit()


def update(session: Session, post: JobPost) -> None:
    session.add(post)
    session.commit()


def get_last(session: Session) -> Optional[JobPost]:
    return session.query(JobPost).order_by(JobPost.id.desc()).first()


def get_labeled(session: Session) -> list[JobPost]:
    return session.query(JobPost).filter(JobPost.label != None).all()


def get_not_labeled(session: Session) -> list[JobPost]:
    return session.query(JobPost).filter(JobPost.label == None).all()


def get_next_for_labelling(session: Session) -> Optional[JobPost]:
    return session.query(JobPost).filter(JobPost.label == None).first()
Putting it all together
Now let's have a look at the CLI command fetch-new. It will download new job posts and save the ones that are not yet in the database based on the last stored job post id:
app = typer.Typer()
console = Console()

@app.command()
def fetch_new():
    console.print("[yellow]Fetching jobs...[/yellow]!")
    job_list = remoteok.fetch_jobs()
    job_list = [transform_jp(job_post) for job_post in job_list]
    with get_session() as session:
        last_job = jobs.get_last(session)
        if last_job is not None:
             job_list = [job_post for job_post in job_list if job_post.id > last_job.id]
        jobs.save(session, job_list)
    console.print("[green]Done![/green]")

if __name__ == "__main__":
    app()
Typer made it easy to define a new command with @app.command() decorator. To get colorized output I placed special color markers in the console.print() calls to the Rich library.
The command can be run with:
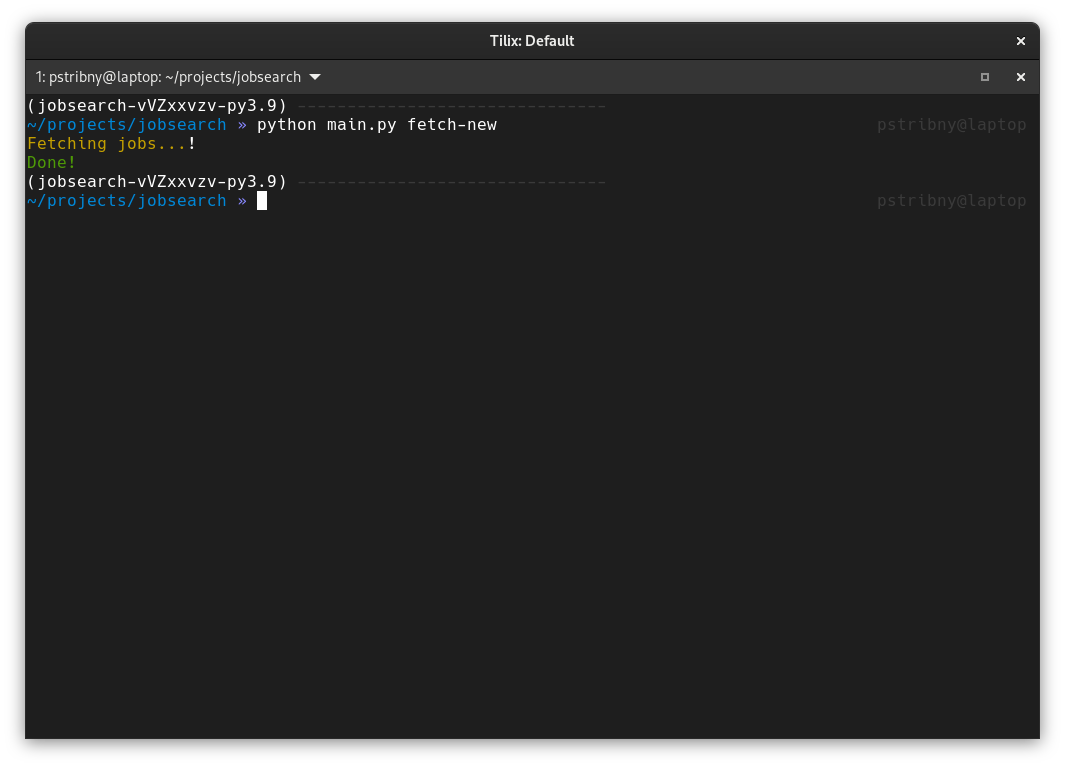
python main.py fetch-new
The output is simple, notifying us that everything went okay:

Labeling data
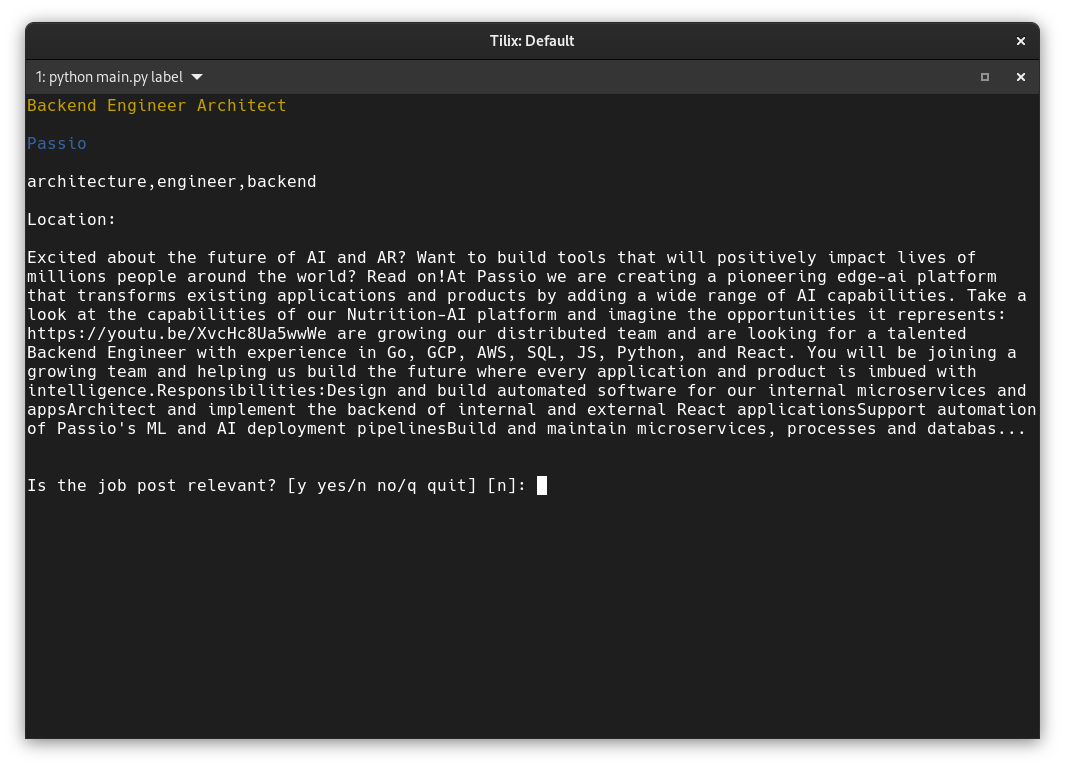
Another command called label features a mini application for job post labeling. We can run it with:
python main.py label

I used a loop that goes through all unlabeled job posts one by one and asks the user to decide whether the particular job offer is interesting or not:
@app.command()
def label():
    while True:
        with get_session() as session:
            jp = jobs.get_next_for_labelling(session)
            if not jp:
                console.print("[red]No job posts available for labelling[/red]")
                break
            console.clear()
            console.print(f"[yellow]{jp.position}[/yellow]\n")
            console.print(f"[blue]{jp.company}[/blue]\n")
            console.print(f"[brown]{jp.tags}[/brown]\n")
            console.print(f"Location: {jp.location}\n")
            console.print(Markdown(f"{jp.description}"))
            result = typer.prompt("\n\nIs the job post relevant? [y yes/n no/q quit]", "n")
            if result in ["n", "no"]:
                jp.label = JobPostLabel.NOT_INTERESTED
                jobs.update(session, jp)
            if result in ["y", "yes"]:
                jp.label = JobPostLabel.INTERESTED
                jobs.update(session, jp)
            if result in ["q", "quit"]:
                console.clear()
                break
It is easy to clear the screen with console.clear() or ask for a simple answer using typer.prompt(). The answer is captured and the job post updated with the proper label.
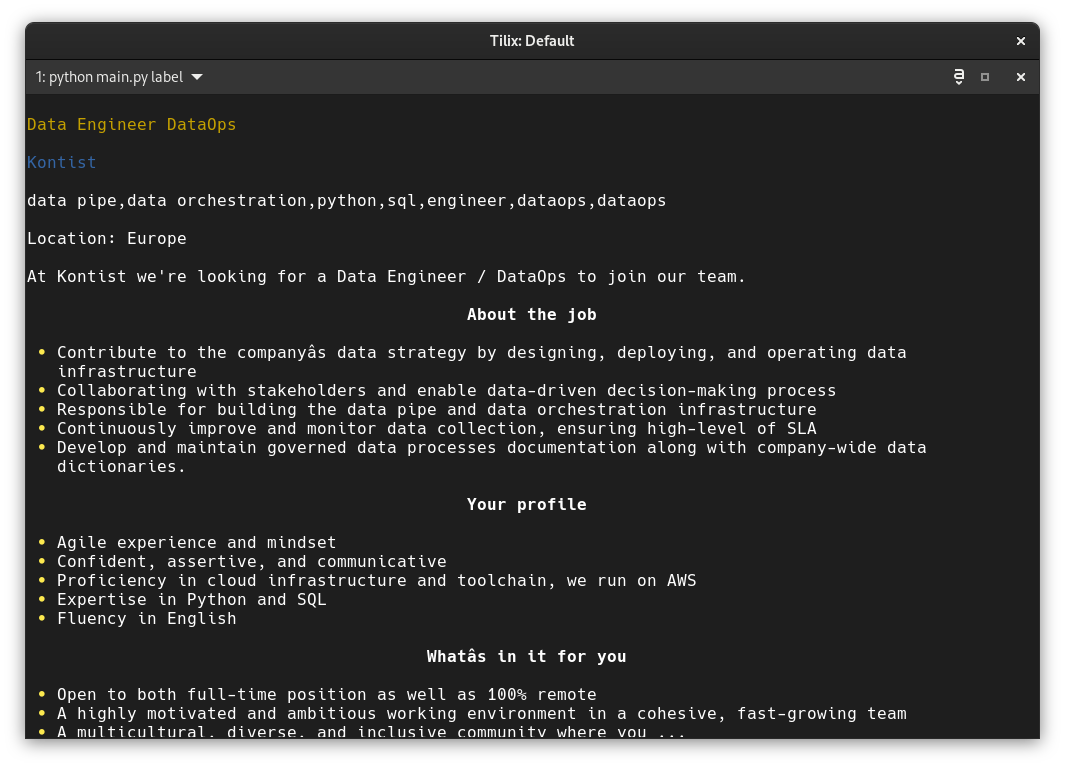
Also, the description attribute of the job posts seems to be in Markdown, so I rendered it like that using the Markdown support in Rich:

Training the model
Before we start training a machine learning model for our job post classifier, it is worth saying that we should have as many job posts labeled as possible to have enough data for accuracy that is better than coin tossing.
To train the model I implemented train command. We can run it with:
python main.py train
Let's have a look at the implementation that will:
- Create a machine learning pipeline that will preprocess the text of each job post and train a classifier.
- Load all labeled job posts into memory.
- Divide the labeled data into "train" and "test" parts. This is because we want to reserve some of the job posts for testing the accuracy of the prediction.
- Make a prediction on the "test" set of job posts and display valuable statistics about the performance of the model.
- Save the trained model on disk so that it can be used later.
@app.command()
def train():
    console.clear()
    console.print("[yellow]Training...[/yellow]!")
    job_clf = Pipeline([
        ('vect', CountVectorizer()),
        ('tfidf', TfidfTransformer()),
        ('clf', SGDClassifier()),
    ])
    with get_session() as session:
        labeled = jobs.get_labeled(session)
        if len(labeled) == 0:
            console.print("[red]No job posts available for labelling[/red]")
            return
    x = [jp.text for jp in labeled]
    y = [jp.label for jp in labeled]
    x_train, x_test, y_train, y_test = train_test_split(
        x, y, test_size = 0.2, random_state = random.randint(1, 1000)
    )
    job_clf.fit(x_train, y_train)
    predicted = job_clf.predict(x_test)
    print(metrics.classification_report(
        y_test, predicted, target_names=["not interested", "interested"], labels=[0, 1])
    )
    dump(job_clf, model_path)
The pipeline
scikit-learn has a notion of pipelines that can be used to define processing steps when training machine learning models. Using Pipeline the data can be passed from and to various data transformers and finally into some ML model.
First we need to tokenize the texts and vectorize the tokens into numerical feature vectors. I used a standard scikit-learn vectorizer CountVectorizer that does both. It uses a "bag of words" or "bag of n-grams" model to represent texts. That means that it only cares about a presence of words or n-grams (a series of words) in a text, which is sufficient in many cases. To use n-grams instead of words we would need to pass it ngram_rangetuple parameter specifying the desired size of the n-grams. CountVectorizer creates a sparse numpy arrays for the feature representation saving a lot of memory and it would take some effort to implement it ourselves. Learn more about how this works in the docs on Text feature extraction and the CountVectorizer.
I didn't clean up the text in any way before throwing it into the CountVectorizer, but to make the model perform better we could for instance remove the Markdown notation from the job post descriptions and specify ignored words using the stop_words parameter.
TfidfTransformer will transform pure counts of the words and n-grams into td-idf representation. Basically it will de-value high-occuring words in the text document if the word is also high-occuring in the whole corpus, in our case across all labeled job posts.
Finally the last part of the pipeline is the classifier itself. Classifiers are machine learning models that classify data into distinct classes based on previously seen samples. I used SGDClassifier. It is a support-vector machine model that is often used in text classification. Alternatively we could for instance use a naïve Bayes classifier MultinomialNB. Note that the models can be configured with various parameters, see the docs for SGDClassifier. The process behind our pipeline is well explained in Working With Text Data which is a good complementary reading.
Training data and making predictions
Once the pipeline is defined, the job post data are split into "train" and "test" datasets using a function from scikit-learn called train_test_split. test_size=0.2 means that 80 % of the data will be used for training while 20 % will be used for testing. Passing a different random_state each time we train will make sure that different test data are selected on each run.
All scikit-learn classifiers have a function called fit(x_train, y_train) that will train them on the passed data. x_train is a list of job posts texts and y_train is a list of corresponding labels (0 or 1). After that, our job post classifier is ready to be used.
Since we reserved a part of the dataset for testing, we can call predict() with the test data to get an array of prediction results and compare it with the original labels. metrics.classification_report() can then print basic statistical data about the performance of the model:

Precision measures how many percent of the predictions were correct, recall measures the ability of a classifier to find all instances of the class in the dataset and f1 score is a weighted harmonic mean of precision and recall that can be used to compare models to each other.
Storing the model
In the end we want to save the model. Joblib or the standard Python module pickle can be used for the job as described in Model persistence. I used Joblib, but it is probably not necessary. From the documentation on Joblib:
joblib.dump() and joblib.load() provide a replacement for pickle to work efficiently on arbitrary Python objects containing large data, in particular large numpy arrays.
As of Python 3.8 and numpy 1.16, pickle protocol 5 introduced in PEP 574 supports efficient serialization and de-serialization for large data buffers natively using the standard library (...)
I don't store the trained model and the labeled database in the git repository, but we could do that as well e.g. using Data Version Control. I wrote about it before in Versioning large files in git with DVC.
Getting recommendations
The last command is recommend, displaying AI-based job recommendations. Run it with:
python main.py recommend
The recommendation process is very simple. We need to load the model we trained and call predict() with the job posts (more specifically their texts) that don't have any assigned label. The result is an array with zeros and ones based on our two label categories. We can then simply display jobs that are recommended, e.g. using a table output:
@app.command()
def recommend():
    if not model_path.is_file():
        console.print("[red]Model is not trained yet[/red]")
        return
    with get_session() as session:
        job_list = jobs.get_not_labeled(session)
    table = Table(show_header=True, header_style="bold magenta")
    table.add_column("Position", style="dim")
    table.add_column("Url")
    job_clf = load(model_path)
    predicted = job_clf.predict([jp.text for jp in job_list])
    console.print("[yellow]Recommended jobs:[/yellow]")
    for i, jp in enumerate(job_list):
        if predicted[i] == JobPostLabel.INTERESTED:
            table.add_row(jp.position, jp.url)
    console.print(table)
The result:

Where to go from here
The example can be significantly improved. If you want to built upon it I recommend you to:
- Play with different classification models and their parameters. Try to achieve good accuracy.
- Use the job offers data in smarter way than just treating everything with the same importance.
- Extend the data source to work with other job boards.
- Create a desktop or web client.
- Handle some corner cases, e.g. deal with expired offers.
- Add some tests for the code. Check out Testing Python Applications with Pytest, the dependency is already installed.
If you want to get a wider overview of the AI landscape besides classification, have a look at my post Artificial Intelligence in Python where I discuss what AI is used for now and list all relevant Python libraries.
And that's it! Good luck in your new role!
Last updated on 17.1.2021.