Testing Python Applications with Pytest
Pytest is a testing framework and test runner for Python. In this guide, we will look at the most useful configuration and usage, including several pytest plugins and external libraries. Although Python comes with a unittest module in the standard library and there are other Python test frameworks like nose2 or Ward,
pytest remains my favorite. The beauty of using simple functions instead of class hierarchies, one simple assert instead of many different assert functions, built-in parametrized testing, a friendly system of fixtures, and the number of available plugins makes it a pleasure to use.

Contents:
- Pytest basics
- Standard test functions and test runs
- Choosing which tests to run
- Fast failures
- Running only failed tests
- Running only changed tests
- Customizing pytest output
- Automatically pass options to pytest
- Using debugger on failures
- Parametrized tests
- Testing exceptions
- Testing logging
- Generating test data with Faker and Mimesis
- Property-based testing
- Fixtures
- Mocking
- Testing database interaction
- Testing web applications
- Testing web APIs based on specification
- Randomizing tests
- Running tests in parallel
- Measuring test execution duration
- Measuring code coverage
- Final words
Examples for this article can be found in the stribny/python-pytest repo.
Pytest basics
After installing pytest, e.g. with Poetry by running poetry add pytest --dev, we can run our test suite with pytest or by invoking python -m pytest, which will additionally add the current directory to sys.path.
Pytest will automatically scan our codebase for test modules, files following the file name convention test_*.py or *_test.py, and scan them for functions named test_*(). If we want to run tests defined as methods inside classes, we need to prefix the class names with Test. Pytest will also automatically pick up any tests written using unittest module.
Typically we will want to put our application tests in a well-defined location like the tests/ folder. In this case, it is a good idea to tell pytest where to look for them using the pytest.ini configuration file:
[pytest]
testpaths = tests
This path configuration can significantly speed up our test runs, especially on large codebases. If we need to further modify how pytest discovers tests, there is an official guide Changing standard test discovery.
The last consideration is how we want pytest to load the test modules. Pytest offers distinct import modes that can be used depending on whether we put our tests in packages (folders with __init__.py file), if we have unique names of the test files and if we need to test the application or library with different versions of Python. The default mode prepend is sufficient for common scenarios where we just test our application with one specific Python version, and all our tests reside in tests/ folder. To avoid name collisions, we can promote the inner test folders into modules by including the __init__.py file.
Standard test functions and test runs
Let’s have a look at a simple test for a function called add which should be able to add two numbers together:
from python_pytest.basics import add


def test_add_can_add_numbers():
    # given
    num = 3
    num2 = 45

    # when
    result = add(num, num2)

    # then
    assert result == 48
There are only two things that we had to do to write a simple test like this: define a function prefixed with test_ and use Python’s assert to check that the result from our function matches our expectation. assert is a part of standard Python and behaves in the same way as we would expect. The only difference is that pytest rewrites the test under the hood before it is run to provide helpful reports when tests fail. And this is the real magic of pytest: we don’t have to remember any special functions when testing different assertions. Any Python code that will evaluate to True or False is a fair game.
You can notice that I tend to use given, when, and then comments to divide the test case into test requirements, the code under test, and expectations. I do that for readability, and I explained it in more detail in Writing test cases with given, when and then.
Now we can just run pytest to get a report on whether the add function behaves correctly:
===================================== test session starts =====================================
platform linux -- Python 3.7.9, pytest-5.4.3, py-1.10.0, pluggy-0.13.1
rootdir: /home/pstribny/projects/python-pytest, inifile: pytest.ini
collected 1 item

tests/test_basics.py .                                                                  [100%]

====================================== 1 passed in 0.04s ======================================
If we now modify the behaviour of add to miscalculate the result, pytest will let us know:
========================================== test session starts ===========================================
platform linux -- Python 3.7.9, pytest-5.4.3, py-1.10.0, pluggy-0.13.1
rootdir: /home/pstribny/projects/python-pytest, inifile: pytest.ini
collected 1 item

tests/test_basics.py F                                                                             [100%]

================================================ FAILURES ================================================
________________________________________ test_add_can_add_numbers ________________________________________

    def test_add_can_add_numbers():
        # given
        num = 3
        num2 = 45

        # when
        result = add(num, num2)

        # then
>       assert result == 48
E       assert 49 == 48

tests/test_basics.py:13: AssertionError
======================================== short test summary info =========================================
FAILED tests/test_basics.py::test_add_can_add_numbers - assert 49 == 48
=========================================== 1 failed in 0.08s ============================================
We can see that pytest will print the values that were compared and point us to the specific assert that failed.
Choosing which tests to run
We have a couple of options to control which tests will be executed:
- Configuring test discovery, as we have already discussed
- Tell pytest which test module or test functions to run
- Use pytest markers to organize tests into groups
Let’s have a look at some examples, assuming that our test test_add_can_add_numbers is in tests/test_basics.py.
To run all tests in a specific test module, we just need to provide the path to the file:
pytest tests/test_basics.py
To run all tests in a specific directory, the path to that directory needs to be provided:
pytest tests/
To run a specific test, we can provide its id, consisting of the test module and its name:
pytest tests/test_basics.py::test_add_can_add_numbers
We can also select tests to run by a keyword expression when using -k flag. In the expression, we can use operators and, or, not and parenthesis, together with filenames, class names, and function names. The search is a bit fuzzy and not properly documented, but we can, for instance run all tests in the module without providing its full path or run all tests except the ones in the module:
pytest -k "basics.py"
pytest -k "not basics.py"
Similarly for function names:
pytest -k "can_add_numbers"
If we regularly need to run a specific set of tests, it is probably best to create custom pytest markers for them. Markers are Python decorators that can be used together with test functions. Some special markers are pre-defined by pytest and have their own special behavior. Others can be defined by us. Let’s have a look at a simple test suite:
import pytest


def test_1():
    ...


@pytest.mark.slow
def test_2():
    ...


@pytest.mark.skip
def test_3():
    ...
The name after @pytest.mark. identifies the marker. The slow is a custom marker that can be used to mark slow tests, while skip is a special pytest marker that will automatically skip the test run of the test.
To run tests marked with our custom marker, we can use -m flag:
pytest -m slow
To run all tests that are not slow, we can again utilize boolean operators in the expression:
pytest -m "not slow"
When using custom markers we should define them in pytest.ini:
[pytest]
markers =
    slow: marks tests as slow
Pytest can show all markers with pytest --markers. In our case, the slow marker is listed together with its description along with built-in markers.
Fast failures
We can stop the execution of the test suite on the first failure with -x or after n failures with --maxfail=n. This technique saves time when running large test suites.
Another option is to use pytest-instafail plugin. It will output information about failed runs immediately, without waiting until the test suites finish.
Running only failed tests
Pytest makes it possible to re-run only failed tests with pytest --lf. This option is super useful when fixing incorrect behavior without running a whole test suite. pytest --ff runs all tests but runs the ones that failed first.
When investigating and fixing multiple failed tests, Pytest can be instructed to run tests until a failure and continue the run once the code is fixed using --sw (--stepwise). Once we run Pytest in a step-wise fashion, we can also choose to ignore a particular test failure with --stepwise-skip.
Running only changed tests
When changing existing tests or developing new code with new test coverage, we might want to ignore all other tests. This can be achieved with an exciting plugin called pytest-picked.
pytest --picked will collect all test modules that were newly created or changed but not yet committed in a Git repository and run only them.
Customizing pytest output
Pytest can be instructed to show more information in the output with verbose modes by using -v or -vv flags. For example, -vv will show all of the assert comparisons on failures that would be otherwise truncated.
Sometimes the output is polluted with various warnings. This situation can happen when we use older versions of libraries that output them. We can hide them with --disable-pytest-warnings.
When tests pass, standard output is captured by pytest and hidden from us. If we use, e.g., the print() function to see some variable state in the test, we might sometimes want to see it. This can be done with -s that will disable this feature.
Summary reports can be customized as well as described in the documentation. See Detailed summary report for details.
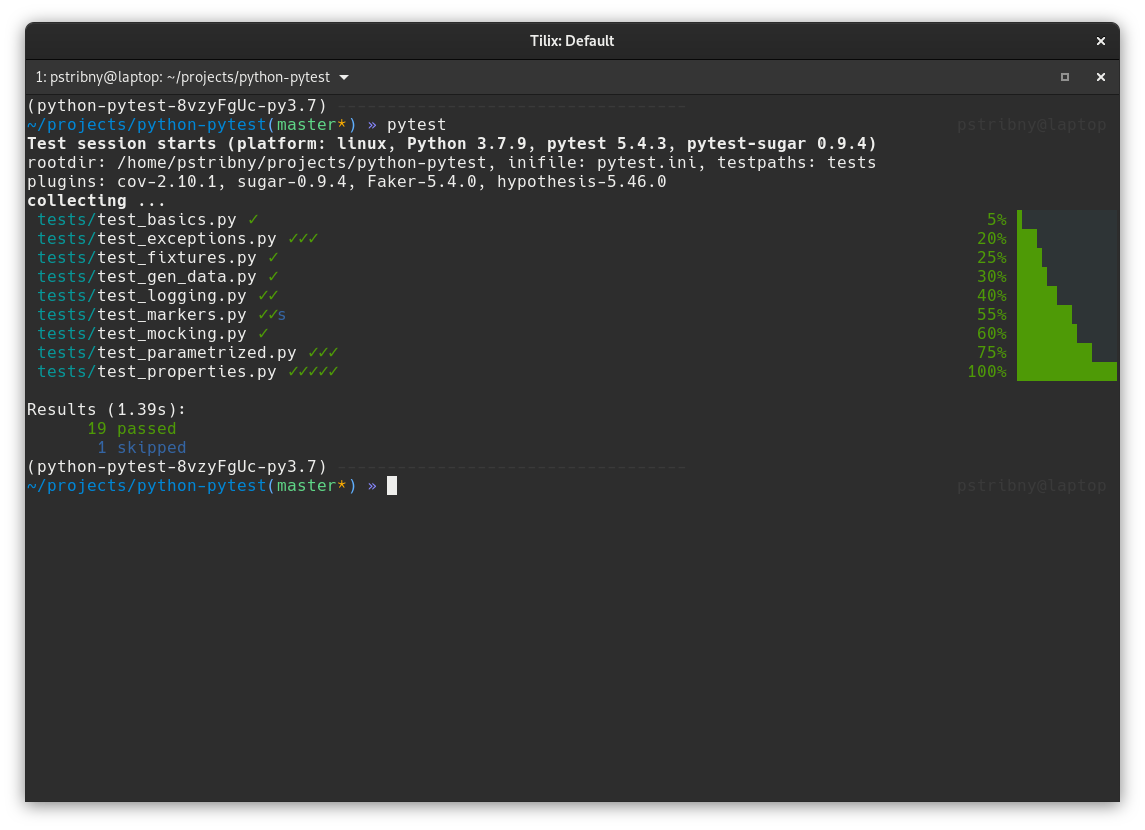
There are some useful plugins that can enhance the output. pytest-sugar is a plugin that, once installed, automatically changes the format of the pytest standard output to include the %-progress when running the test suite.
To see nicer diffs of dictionaries, arrays and the like, we can use pytest-clarity or pytest-icdiff plugins.
Automatically pass options to pytest
Options and flags like -v can be passed automatically by using addopts configuration option in pytest.ini. For instance, if we don’t want to see warnings in the output without specifying in every time on the command line, we can write our INI file like this:
[pytest]
addopts = --disable-pytest-warnings
Using debugger on failures
Pytest allows us to get into standard interactive debugger pdb on test failures with --pdb. We can also use Python’s standard breakpoint() function call to drop into the debugger at any place.
I have a small pdb debugging example in another post Debugging Python programs.
Parametrized tests
Pytest marker @pytest.mark.parametrize can be used to feed different data into one test function and turn it into multiple tests. The first parameter is a string listing all arguments that will be set for the test and the second one is a list of tuples with the matching data.
import pytest
from python_pytest.basics import add


@pytest.mark.parametrize("num,num2,result", [
    (10, 20, 30),
    (25, 25, 50),
    (11, 19, 30)
])
def test_add_can_add_numbers(num, num2, result):
    assert add(num, num2) == result
Testing exceptions
Testing that a system under test throws an exception is easy. Pytest provides a pytest.raises context manager for this purpose. In this example, I am parametrizing the test function with different exceptions that are then raised by raise_exc function and captured by the context manager:
import pytest
from python_pytest import exceptions


@pytest.mark.parametrize("exc", [(ValueError), (ImportError), (IndexError)])
def test_raise_exc(exc):
    with pytest.raises(exc):
        exceptions.raise_exc(exc)
Testing logging
We can also test that a particular code writes messages to logs. Let’s introduce a function that will log successful iterations with logger.info() and errors with logger.exception():
import logging


logger = logging.getLogger(__name__)
logger.setLevel(logging.DEBUG)


def log_iterations(n_iterations: int) -> None:
    try:
        if n_iterations < 0:
            raise ValueError("Number of iterations cannot be negative")
        for i in range(n_iterations):
            logger.info('Iteration i=%d', i)
    except ValueError as ex:
        logger.exception("Iterations couldnt be logged", exc_info=True)
        raise ex
How can we test this?
We can leverage pytest’s fixture called caplog. We will talk about fixtures in a moment, but essentially fixture is an argument automatically passed to our test function by its name. So all we need to do is to define caplog as the function’s argument and then use it to examine the captured messages from the logger:
import logging
import pytest
from python_pytest.logging import log_iterations


def test_iterations_logged(caplog):
    # given
    n_iterations = 10
    caplog.set_level(logging.DEBUG)

    # when
    log_iterations(n_iterations)

    # then
    assert len(caplog.records) == n_iterations
    assert caplog.records[0].message == "Iteration i=0"
    assert caplog.records[0].levelname == "INFO"
    assert caplog.records[9].message == "Iteration i=9"
    assert caplog.records[9].levelname == "INFO"


def test_iterations_exception_logged(caplog):
    # given
    n_iterations = -1
    caplog.set_level(logging.DEBUG)

    # when
    with pytest.raises(ValueError):
        log_iterations(n_iterations)

    # then
    assert caplog.records[0].message == "Iterations couldnt be logged"
    assert caplog.records[0].exc_info[0] is ValueError
Generating test data with Faker and Mimesis
We can utilize Python libraries Faker and mimesis to generate common types of test data like first names, job titles, addresses, and so on.
For instance, if we write a function to test whether a color code is valid, we can let Faker generate a new color code on every test run so that we can test various codes over time:
def is_color(code: str) -> bool:
    if not code:
        return False
    if not code.startswith('#'):
        return False
    if not len(code) == 7:
        return False
    return True

...

from faker import Faker

fake = Faker()

def test_is_color_accepts_valid_color_codes():
    # given
    color_code = fake.color()

    # when
    result = is_color(color_code)

    # then
    assert result == True
Property-based testing
An interesting approach to generate test data is to use property-based testing. It allows us to specify more general data properties, e.g., to take all positive integers or all strings based on a regex pattern, and let a testing library generate samples that match these expectations. In Python, we can use Hypothesis library.
As an example, let’s have a look at a class Person that allows the person to grow older:
class Person:
    def __init__(self, age: int):
        self.age = age

    def grow_older(self):
        if self.age > 100:
            raise ValueError()
        self.age += 1
Of course, we could now test grow_older() method using a boundary of 100 for allowed behavior. With Hypothesis, we can test it on all valid integers at once, including lower numbers:
import pytest
from hypothesis import given, assume
from hypothesis.strategies import integers, text, datetimes, from_regex, builds, composite
from python_pytest.properties import is_first_name, is_before_datetime, Person

@given(integers(1, 100))
def test_person_can_grow_older(age):
    # given
    person = Person(age=age)

    # when
    person.grow_older()

    # then
    person.age == age + 1
Hypothesis uses the term strategy for data generators. In our case, the integers() call returns a strategy to generate integers. An integer is selected from the strategy and passed as the age argument.
We don’t have to generate just standard types like int, but we can build the entire Person object using builds and pass it as well:
@given(builds(Person, age=integers(1, 100)))
def test_person_can_grow_older_2(person):
    current_age = person.age
    person.grow_older()
    person.age == current_age + 1
Let’s have a look at another example to generate a more complex data type. To do this we will define a function to verify first names:
def is_first_name(name: str) -> bool:
    if name is None or len(name) < 3:
        return False
    if not name.isalpha():
        return False
    if not name[0].isupper():
        return False
    if not name[1:].islower():
        return False
    return True
Now we need a way to generate valid first names using Hypothesis. We will use the @composite decorator that makes it possible to define parts of a more complex object and combine the rules together:
@composite
def first_names(draw):
    allowed_first_letters = ['A', 'B', 'C', 'D', 'E', 'F', 'G', 'H', 'I', 'J', 'K']
    lower_letters_strategy = from_regex(regex=r"^[a-z]$", fullmatch=True)
    first_letter = draw(text(alphabet=allowed_first_letters, min_size=1, max_size=1))
    rest = draw(text(alphabet=lower_letters_strategy, min_size=2, max_size=10))
    return first_letter + rest
We use two different strategies here to compose our own strategy for first names. The first one takes a list of allowed characters that will be used as a capital letter at the beginning. The second one uses a regex to complete the string with some additional lower-case characters. We then draw samples from both strategies and concatenate our final first name.
We can then use it as any other strategy:
@given(first_names())
def test_is_first_name(first_name):
    assert is_first_name(first_name)
This was just an example of how to combine multiple strategies together. We could also use just a single strategy from_regex(r"^[A-K][a-z]{1,10}$", fullmatch=True).
Fixtures
We have already seen caplog built-in fixture to test logging. Pytest features some other fixtures that can be listed with pytest -q --fixtures.
The biggest power in using fixtures is being able to define our own. A fixture can provide some reusable test data for our tests, contain some before/after logic, or return a useful object, e.g., a configured HTTP client or a database session.
All we have to do is define a function in conftest.py file with @pytest.fixture decorator. Let’s see a simple example of a fixture that provides a reusable database of allowed names:
@pytest.fixture
def allowed_names():
    return ["Peter", "Mark", "Mary"]
To use it all we have to do is to name an argument for our test function with the same name as our fixture:
def test_allowed_names(allowed_names):
    # when
    name = get_name()

    # then
    assert name in allowed_names
By default, fixtures are function-scoped, meaning that a fixture’s lifetime is tied to the execution of the test function. However, this behavior can be changed to one of the other supported scopes (function, class, module, package, or session).
Pytest fixtures can also be parametrized (taking arguments). See Parametrizing fixtures in the documentation.
We can list all unused fixtures with pytest-deadfixtures plugin using pytest --dead-fixtures. Doing this can help us avoid keeping unnecessary code around.
Mocking
If we need to mock an external dependency or test a system’s behavior under test, the simplest way is just to use the unittest.mock module in Python’s standard library.
For demonstration, let’s introduce a simple code that should be able to check whether a particular link is present on Google’s result page:
import requests


def download_google_result_page(query: str) -> str:
    results_page = requests.get(f"https://www.google.com/search?q={query}")
    return results_page.text


def is_link_on_result_page(link: str, query: str) -> bool:
    return True if link in download_google_result_page(query) else False
The problem is that our link might not always be on Google’s result page, making the test runs inconsistent. All we care about is whether the is_link_on_result_page function can recognize the link being present if it is.
unittest.mock module provides a lot of functionality, but I find the patch context manager to be the most useful, simply allowing us to replace a dependency. In our case, we need to replace download_google_result_page to return a fake results page containing our link:
from unittest.mock import patch
from python_pytest.mocking import is_link_on_result_page


def test_check_link_in_result_can_recognize_if_link_present():
    # given
    query = "python"
    link = 'https://stribny.name'
    result_page = f'<a href="{link}"></a>'

    # then
    with patch('python_pytest.mocking.download_google_result_page', lambda query: result_page):
        assert is_link_on_result_page(link, query) == True
The documentation on unittest.mock is very comprehensive.
We might also find the pytest-mock plugin useful, although it is not necessary.
Testing database interaction
There are different strategies for how to go about integration testing with a database system. The most important decision is to choose how to handle test data setup and teardown. Some people might utilize transactions and rollbacks. Others would recreate and drop tables or create and delete individual rows (or some alternative when using a non-relational database).
I will demonstrate a simple setup/teardown process that can be achieved by defining a custom fixture. This fixture will prepare data tables before a test is run, cleanup all records after it is finished, and expose a database session object that the test can use to communicate with the database. But first, let’s have a look at a simple code that will serve as our code under test:
from sqlalchemy import create_engine
from sqlalchemy.ext.declarative import declarative_base
from sqlalchemy.orm import sessionmaker
from sqlalchemy.orm import Session
from sqlalchemy import (
    Column,
    Integer,
    String,
)


SQLALCHEMY_DATABASE_URL = "sqlite:///./instance/test.db"
engine = create_engine(
    SQLALCHEMY_DATABASE_URL, connect_args={"check_same_thread": False}
)
SessionLocal = sessionmaker(autocommit=False, autoflush=False, bind=engine)
Base = declarative_base()


class User(Base):
    __tablename__ = "users"

    id = Column(Integer, autoincrement=True, primary_key=True, index=True)
    email = Column(String, unique=True, nullable=False)


def get_session() -> Session:
    return SessionLocal()


def save_user(session: Session, user: User) -> None:
    session.add(user)
    session.commit()
We will be testing the save_user() function and utilizing get_session() function to obtain a database session to a local SQLite database using SQLAlchemy.
Let’s now define our fixture:
import pytest
from python_pytest.db_interaction import User, Base, engine, get_session


def db_set_up(session):
    Base.metadata.create_all(bind=engine)


def db_tear_down(session):
    session.query(User).delete()
    session.commit()
    session.close()


@pytest.fixture
def session():
    session = get_session()
    db_set_up(session)
    yield session
    db_tear_down(session)
We have defined a fixture named session that creates a session, makes sure that the data tables are created, and yields to our test case after that. Using yield allows us to run some code before and after the test while exposing the session object. Once the test is run, the fixture will delete all User rows (deleting rows is generally faster than dropping and recreating the tables). We might need to use a different approach if we would like to run such integration tests in parallel, but that is outside of the scope of the article.
Once all of this is done, the only thing missing is the test itself:
from python_pytest.db_interaction import User, save_user


def test_user_can_be_saved(session):
    # given
    user_id = 1
    user_email = "example@example.com"
    user = User(id=user_id, email=user_email)

    # when
    save_user(session, user)

    # then
    saved_user = session.query(User).filter(User.id == user_id).first()
    assert saved_user.email == user_email
The session object will be automatically injected based on the argument’s name, and we can safely use it to test any database interaction.
And that’s all! If you use a relational database, you might also enjoy my article on Scaling relational SQL databases.
Testing web applications
Pytest features plugins to make it easier to test applications written using popular Python web frameworks like Flask with pytest-flask or Django with pytest-django. When using FastAPI, it is enough to use the official TestClient object as described in the FastAPI documentation on testing.
If we are interested in testing web UI with Selenium, we can use SeleniumBase.
Testing web APIs based on specification
A neat approach to testing web APIs is to leverage API specification in the form of OpenAPI and generate property-style tests from it with Schemathesis. Schemathesis will generate hypothesis strategies for our endpoints and execute calls based on them. Read more about it directly from the author in Schemathesis progress report.
Randomizing tests
Tests should ideally not depend on one another, and we can check that with pytest-randomly.
Running tests in parallel
We can run test in parallel with pytest-parallel and pytest-xdist plugins. The documentation for pytest-parallel explains the difference:
pytest-xdist is great to run tests that:
- aren’t threadsafe
- perform poorly when multithreaded
- need state isolation
pytest-parallel is better for some use cases (like Selenium tests) that:
- can be threadsafe
- can use non-blocking IO for http requests to make it performant
- manage little or no state in the Python environment
Put simply, pytest-xdist does parallelism while pytest-parallel does parallelism and concurrency.
When parallelizing tests, we need to think a little bit about if we can parallelize the tests and how to do that. For instance, in our database integration test example, we would need to make sure that the individual tests get their own database instance or provide some other type of isolation. Also, a good idea is to use pytest markers to mark tests that can and can’t run in parallel.
With pytest-parallel, we can choose how many workers to run or how many tests to run per worker. The invocation can be as simple as pytest --workers 2 to use two workers, which will automatically distribute the tests between them.
Measuring test execution duration
It is easy to find slow tests with pytest. If we combine -vv with --durations=0 option, it will display all tests together with their duration time. The output will look something like this:
===================================== slowest test durations =====================================
0.53s call     tests/test_properties.py::test_person_can_grow_older_2
0.33s call     tests/test_properties.py::test_person_can_grow_older
0.27s call     tests/test_properties.py::test_is_first_name
0.24s call     tests/test_properties.py::test_is_before_datetime
0.13s call     tests/test_properties.py::test_person_cannot_grow_older
...
To see only n slowest tests, use --durations=n, e.g., 3 slowest tests can be displayed with --durations=3.
Measuring code coverage
The easiest way to see the test code coverage is to install pytest-cov plugin. We can get the summary straight on the command line with pytest --cov=<module> <testsfolder>:
pytest --cov=python_pytest tests/
Name                              Stmts   Miss  Cover
-----------------------------------------------------
python_pytest/__init__.py             1      0   100%
python_pytest/basics.py               2      0   100%
python_pytest/db_interaction.py      21      6    71%
python_pytest/exceptions.py           2      0   100%
python_pytest/fixtures.py             2      0   100%
python_pytest/gen_data.py             9      3    67%
python_pytest/logging.py             12      0   100%
python_pytest/mocking.py              6      2    67%
python_pytest/properties.py          20      4    80%
-----------------------------------------------------
TOTAL                                75     15    80%
We can dig into why certain modules are not covered using the HTML report with --cov-report html argument:
pytest --cov-report html --cov=python_pytest tests/
The results will be saved in htmlcov folder.
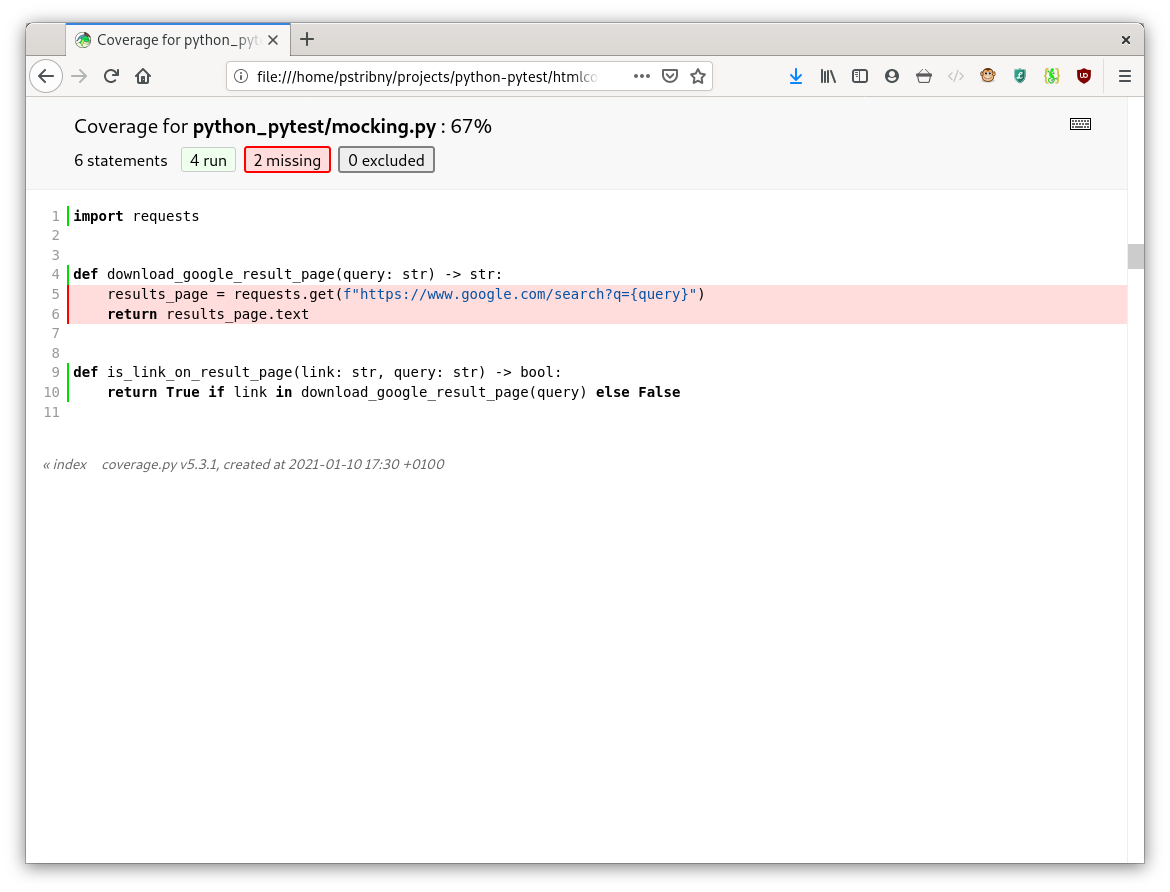
As we can see on the screenshot, we only tested one function while mocking the other. That’s why the coverage reported is below 100 %.
Final words
There are many other ways to customize and use pytest, but these are fairly advanced and not often necessary. For example, we can use pytest-asyncio to work with asynchronous Python code or pytest-benchmark for code benchmarking.
And that’s all! Happy testing!
Last updated on 19.3.2022.